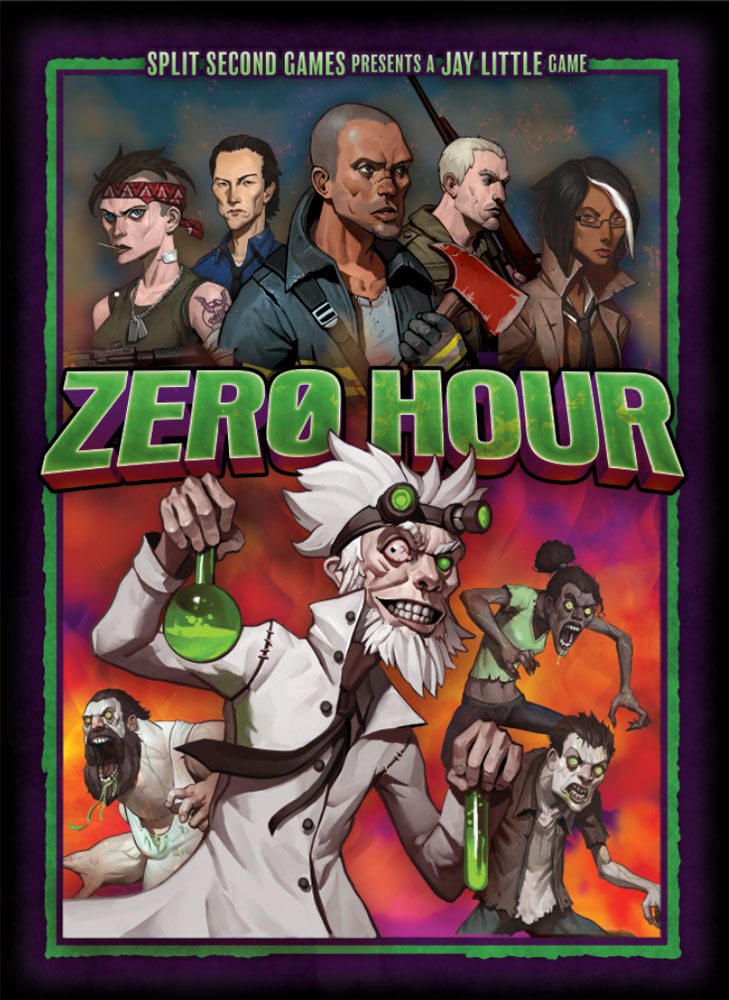
The Z-B13 virus is spreading, turning the infected into the Afflicted! (They’re perhaps a little sensitive about the term “zombies.”) Explore cities, gather resources, and uncover the mastermind behind the virus before you succumb! Are you ready for Zero Hour?
What Is Zero Hour?
Zero Hour is a cooperative game for 1 to 4 players, ages 14 and up, and takes 1–2 hours to play. It’s currently seeking funding on Kickstarter, with a pledge level of $49 for a copy of the game, or $59 for the deluxe version with wooden health and research tokens. Since it’s a cooperative game, you can play with younger players; it’s a zombie-themed game, so depending on your kids’ tolerance for creepy illustrations, it may or may not be appropriate for them.
New to Kickstarter? Check out our crowdfunding primer, and visit our Kickstarter curated page for more projects we love.
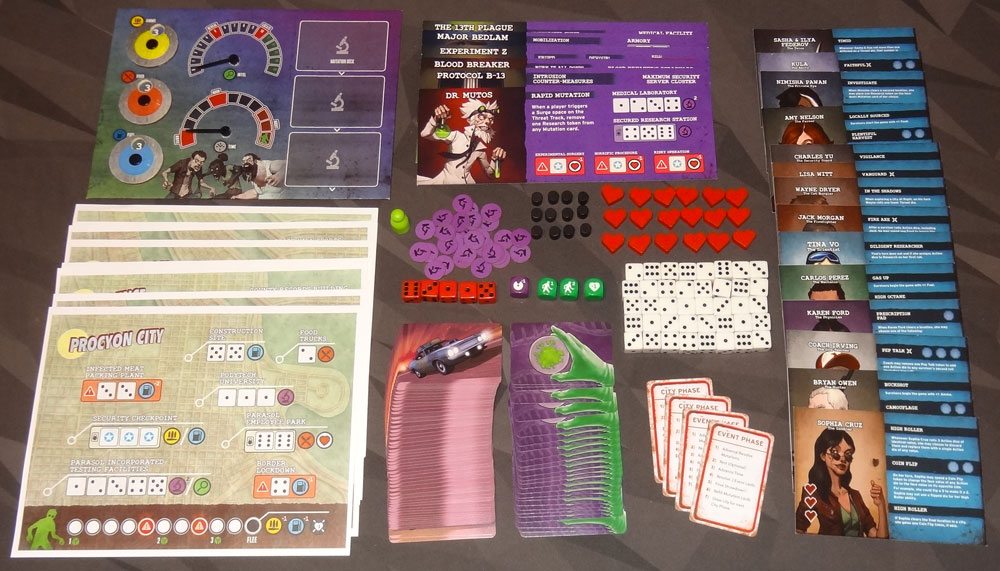
Zero Hour Components
Note: my review is based on a pre-production prototype, so components are subject to change and the component quality may not reflect the actual product. The illustrations look mostly finished to me, but I don’t know if anything else will be changed due to stretch goals or other developments.
- Tracking board
- 10 City Map boards
- 12 Survivor sheets (+2 Bonus Kickstarter characters)
- 6 Mastermind sheets
- 48 Event cards
- 26 Mutation cards
- 4 Player Reference cards
- 40 Action dice
- 3 Threat dice
- 5 Intel dice
- 1 Mastermind die
- 30 Research tokens
- 1 Threat Track marker
- 18 Health tokens
- 12 Ability tokens
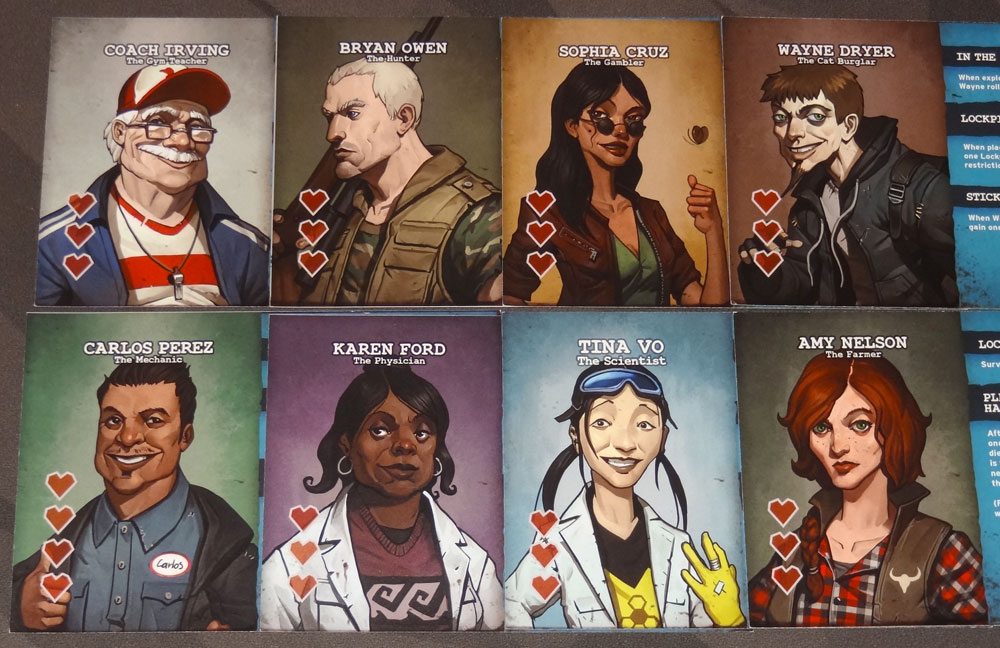
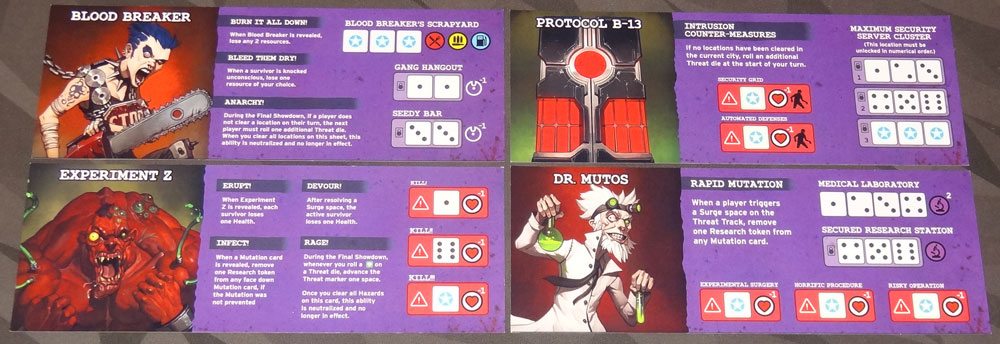
The character illustrations in the game are by Matias Tapia, and I really like the style. I also love the fact that there’s a diverse group of survivors in the game—men and women of different colors. Each one has its own special abilities.
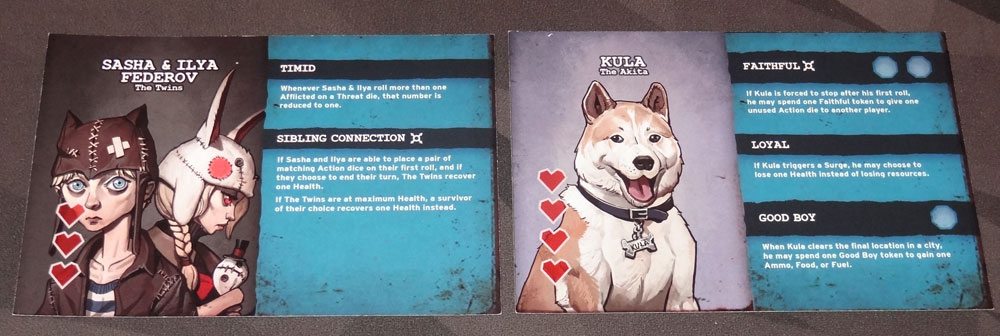
The Kickstarter version will come with two bonus survivor sheets: Sasha and Ilya, the twins, and Kula the dog!

Most of the dice are standard six-sided dice: the action dice are white and the intel dice are red. The threat dice and mastermind die are custom dice, though. My prototype version was engraved and painted, so I’m guessing the final version will be, too.
My prototype included cardboard research tokens and wooden health tokens. Depending on the level you pledge at, yours will be either both cardboard or both wood. There’s also a $75 reward tier that includes a folding dice tray.
How to Play Zero Hour
You can download a draft of the rulebook here, as well as a Print and Play if you’d like to give it a try before you pledge.
The Goal
The goal of the game is to reveal the mastermind, defeat it, and fully research all of the virus mutations.
This being a cooperative game, there are several ways to lose:
- Run out of ammo, food, or fuel.
- Be forced to flee during the final showdown against the mastermind.
- All survivors are unconscious.
- There are two or more Incurable mutation cards.
If any of those things happen, you lose the game.

Setup
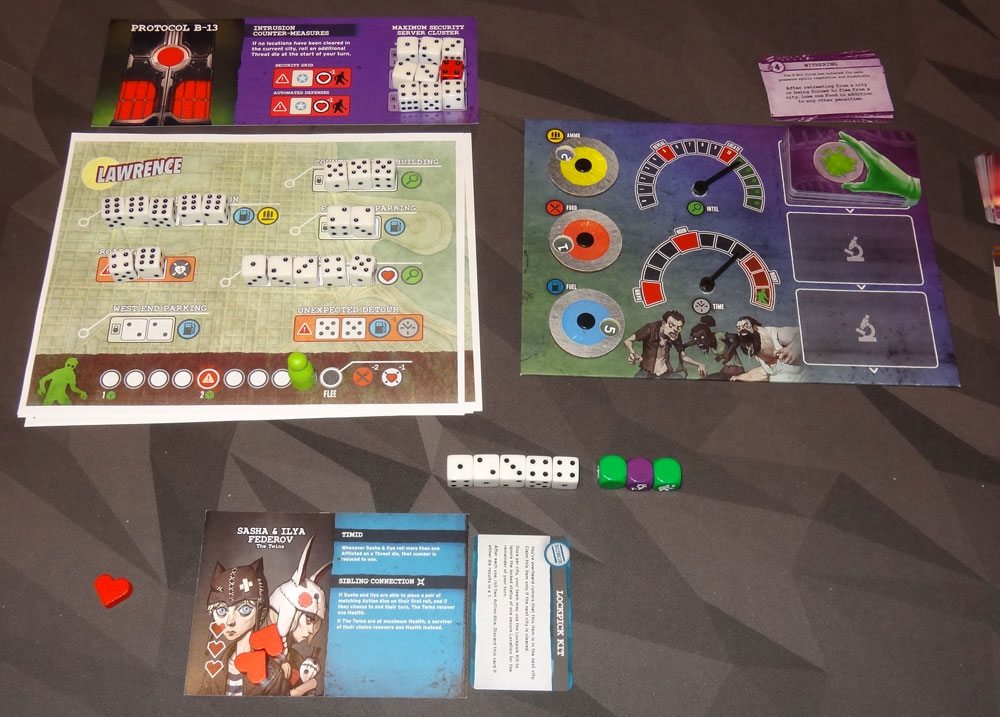
Put the tracking board on the table, with ammo, food, and fuel set to 3 each. Set the intel to 0, and the time to “Dawn.” Randomly select a mastermind sheet (without looking) and place it face-down. Shuffle the city maps, and place them in a stack, day side up.
Shuffle the mutation deck and place it on the top space of the mutation track, and then place the top two cards face-down on the mutation track. Shuffle the event deck and place it nearby.
Each player takes a survivor sheet, and health tokens and ability tokens as indicated on the sheet.
Gameplay
The game alternates between the City Phase and the Event Phase until you confront the mastermind or lose the game. During the City Phase, players take turns exploring the city, attempting to clear locations, researching mutations, and gathering intel about the mastermind, until they clear the city, retreat, or are forced to flee. The Event Phase takes place between cities: the virus mutates, time passes, and events occur.
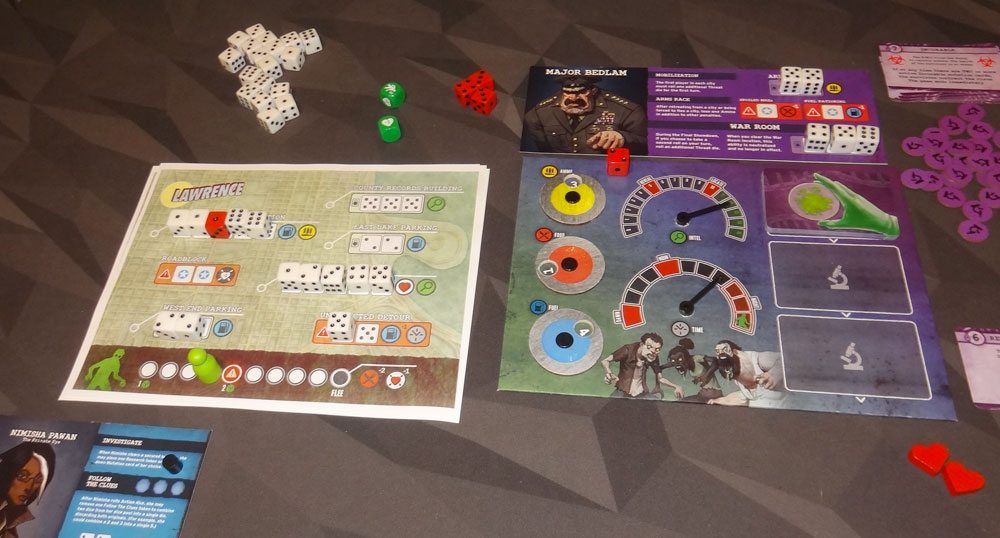
The tracker board has dials to keep track of your ammo, food, and fuel, as well as the amount of intel you’ve gained, the amount of time that has passed, and the mutation track.
City Phase
The City Phase is where your actions take place. On your turn, you decide whether to explore the city or leave.
Exploring the City
To explore, you take these steps:
- Roll Dice: 5 action dice, and as many threat dice as shown on the threat track at the bottom of the city board.
- Re-roll Dice: You may spend 1 food to re-roll any number of action dice, or 1 ammo to re-roll any number of threat dice.
- Resolve Threat Dice: Threat dice may advance the threat marker along the track, or cause you to lose health.

- Assign Action Dice: You may put any number of dice on one location, hazard, or mutation card. Locations and hazards must be filled from left to right. “Locked” sections of a location mean that those dice must be placed in a single turn, and stars mean that any value may be used—but all star spaces at that location must use the same value. Dice with value “6” may be used to place research tokens on a face-down mutation card. Hazards are negative, but if you can’t use any dice elsewhere, you may be forced to put dice on a hazard space instead.
- End Turn Check: If you researched, cleared a location, or were unable to assign any dice, your turn ends.
- Second Action (optional): If you did not trigger the end of your turn, you may take a second action. You may set aside one action die to save its value, and then re-roll all blank threat dice and the rest of the action dice. Resolve those as before.
The threat track along the bottom of each city has a number of symbols. The small green cube symbol with a number indicates how many threat dice you need to roll when you explore—as the threat level increases, you’ll roll more threat dice, too. The red exclamation point is a surge space—when the threat marker reaches that level, you must lose 1 resource of your choice. Finally, if the threat marker ever reaches the black “Flee” space, you’ve been forced to flee the city, and you suffer the penalties shown on the right.
If you manage to clear a location by filling up all the dice slots, you get the reward shown on the end, which may be resources, research tokens, health, or intel.
Going Unconscious
If you ever lose all of your health, you have been knocked unconscious: you’ll sit out the rest of that city, unless you regain health, in which case you are revived and will take your turn as normal. If you start a new city unconscious, you recover two health, but also attract some Afflicted—the threat marker advances one extra space. You can’t use abilities while unconscious.
Leaving the City
If you clear all the locations (not counting hazards), you gain 2 intel, and you may leave the city. Or, if you have cleared at least as many locations as there are unconscious survivors, you may choose to retreat, even if the locations aren’t all cleared. Finally, if you reach the end of the threat track, you are forced to flee. The City Phase ends, and the Event Phase begins.
Event Phase
The next player in turn order is the Driver, who will make any decisions for the group if you can’t come to a consensus. “Seriously—if you can’t stop bickering, I’m going to turn this car around.”
The Event Phase has several steps:
- Advance Mutations: If you cleared the city or retreated, move the mutation cards one space down the track. If you were forced to flee, move the cards down two spaces. Any cards that leave the track are revealed. If there are enough research tokens, the event is discarded, along with the research tokens. Otherwise, the event is left in play (with the research tokens) and any effects that it has are now in play.
- Rest (optional): You may choose to rest up to two times—for each rest, all survivors regain one health.
- Advance Time: Move the time marker based on these outcomes:
- Cleared previous city: 2 time
- Retreated from city: 1 time
- Prevented mutation: 1 time per prevented mutation
- Rest: 1 time per rest

if you can clear the next city. (Prototype shown) Photo: Jonathan H. Liu
- Resolve Two Event Cards: Draw and resolve two event cards, one at a time. For each one, read the card and do what it says—sometimes you will have a choice. You may spend one fuel to discard and re-draw an event. Some events have a clock icon at the bottom—these will move the time tracker, unless you spend fuel to ignore them. There are also some blue cards called “rumors,” which are good. If you manage to clear the next city, you will get a bonus of some sort.

- Mastermind Activity: If you have 5 Intel, you flip the mastermind sheet over and reveal it. Some masterminds have effects that occur as soon as they come into play, and they may also have ongoing passive effects. Locations and hazards shown on the mastermind board are only used during the final showdown.
If you have 10 or more Intel, you may choose whether to confront the mastermind in the next city. If you have 15 intel, you must trigger the final showdown. If you do the final showdown, do not refill the mutation track. Otherwise, fill the mutation track with one card each.

- Draw Next City: Draw the next city board. If the time has reached “Night,” you will start on the night side of the board instead. If the time marker is on or past the red “noon” square, you will increase the threat level by one extra space. Also, for each space the time would have increased past the last time space, you increase the threat level by one space. (If you arrive in a city at night, you’ll reset the time marker.)
Then you’re back to the City Phase again, as you explore the newly drawn city.
Final Showdown
When you decide to confront the mastermind (or you have to because you have reached 15 intel), you face them in a final showdown in the next city. First, the mastermind card becomes part of the city, with the hazards and locations becoming active. The mutation deck is removed, but any remaining face-down mutations are now revealed and become active (unless they were prevented with research tokens).
During the final showdown, you may now add research tokens to face-up mutations—when they have been sufficiently researched, they are discarded and no longer have an effect.
Intel Dice
If you had more than 10 intel, you can get up to 5 red intel dice. These are rolled at the beginning of the showdown, and may not be rerolled with food. At any point, you may discard an action die to use one of the red intel dice in its place as if you had rolled it.
Mastermind Die
Add the purple mastermind die to whatever threat dice you are rolling. The mastermind die may advance the threat track one space, but it can also cause you to lose a resource, lose a research token, or lose the right-most die from all non-cleared locations.
Game End
You win the game if you successfully clear all locations (including those on the mastermind sheet) and you eliminate all active mutations.
If you run out of a resource, or are forced to flee from the final showdown, or all players are rendered unconscious, you lose the game.

Why You Should Play Zero Hour
Zero Hour is a zombie game that doesn’t really use the word “zombies” in the game much (if at all): it’s about a virus, and the people affected by it are the Afflicted, but other than the cover image you don’t see a lot of them, just that green silhouette on the threat track. However, you do suffer the effects of the Afflicted throughout the game, and it’s up to you how you want to interpret those thematically. When you use your precious ammo to re-roll a threat die, you’re preventing a wound or keeping the threat level from rising: did you kill off an attacking Afflicted? Or were there some non-Afflicted enemies out there, too?
Even though the zombie theme may be somewhat subdued, the gameplay is still engaging, with lots of tough decisions to make. You’ll be put into difficult situations often, trying to decide whether to risk one more exploration into the city or to run away and lick your wounds.
When you roll dice, you’ll first decide whether to spend ammo or food to re-roll some dice. Is it worth it? You can only have up to 6 of each resource, so everything is precious. If you use up an ammo and then roll the same result (or something worse), you’ll feel really dumb. I’ve used up food trying to get a particular number for a secure location, and failed multiple times. Sometimes, you’ll have the right dice to clear a location, but you’re not sure you want to clear it just yet because you won’t be able to claim the reward—for instance, when the reward is 1 health but you’re currently at full health. Do you clear the location just to get it done? Or do you wait, hoping that you’ll have the right number later when you need the reward?

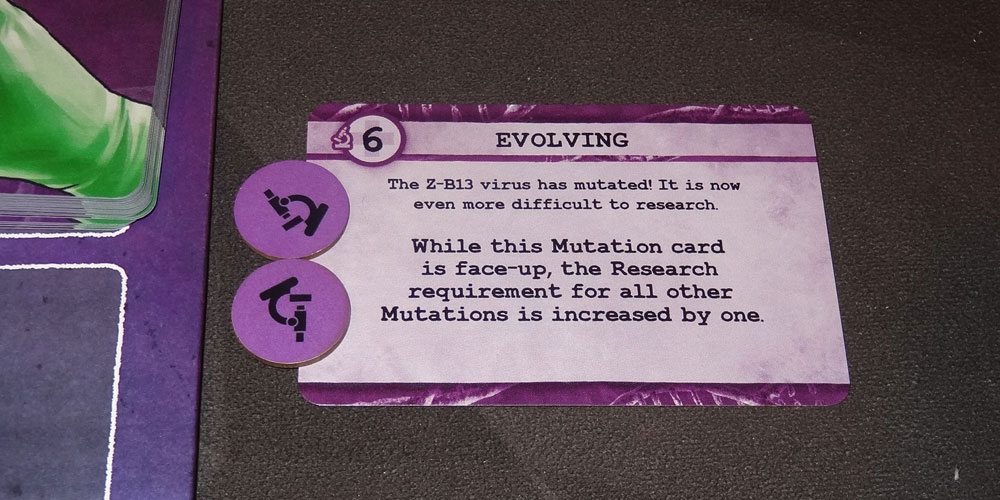
Another choice is between clearing locations and doing research. You can only research with “6” value dice, and it prevents you from taking a second action on your turn. Is it worth it if you only have one 6 die? Two? The mutations require between 4 and 7 research to prevent: some mutations have effects right away, and some only affect the final showdown. You never want to spend more research than necessary because it means you wasted precious dice, but if you’re just one short, the mutation is active and can’t be further researched until the final showdown. Are you willing to risk a chance that the next mutation is “Incurable”?
Taking a second action can be really beneficial if you already had to resolve threat dice—you may get to place more dice without risking more threats, and you can reserve one die if you know there’s something you are guaranteed to place. But, of course, taking a second action means you have fewer action dice available (because you had to place at least one on the first action), and if you don’t roll anything good, you’ll move the time track forward or potentially trigger a hazard. And if you have blank threat dice? Well, you’ll have to decide whether you have enough action dice leftover to risk another threat.
The masterminds are challenging, and their special abilities change how the game feels once they show up. Depending on which mastermind you’re facing, you will take different approaches and the risk/reward formula changes in various ways.
Zero Hour is a tough game—I’ve lost all the times I’ve played it so far, though I’ve come very close. It scales well, too, though some of the player powers work better in solo games than others. I really like the tricky choices you’re presented with throughout the game, though the events sometimes feel excessively brutal—quite often you look at one and think, well, there are no good choices here.
My older kids aren’t fond of zombies at all, so they didn’t want to play it with me, though I did play a game with my 4-year-old. I just let her roll dice, told her what options she had for them, and let her make decisions when it was her turn. We lost. So now I know, in the event of a zombie apocalypse, I shouldn’t let the 4-year-old decide our strategy. I would say, based on the gameplay, you could probably teach it to experienced 10-year-olds, as long as they’re not put off by the theme or artwork.
If you like challenging cooperative games, or you’re into anything with zombies, or you just love rolling dice, take a look at Zero Hour! It’s definitely one that has a lot of luck involved (with the dice and card draws) but the player powers allow for some room for strategic maneuvering, too. However, if you prefer a game that is purely strategic without chance, it’s probably not the game you’re looking for.
For more information or to make a pledge, visit the Zero Hour Kickstarter page!
Click here to see all our tabletop game reviews.
Disclosure: GeekDad received a prototype copy of this game for review purposes.