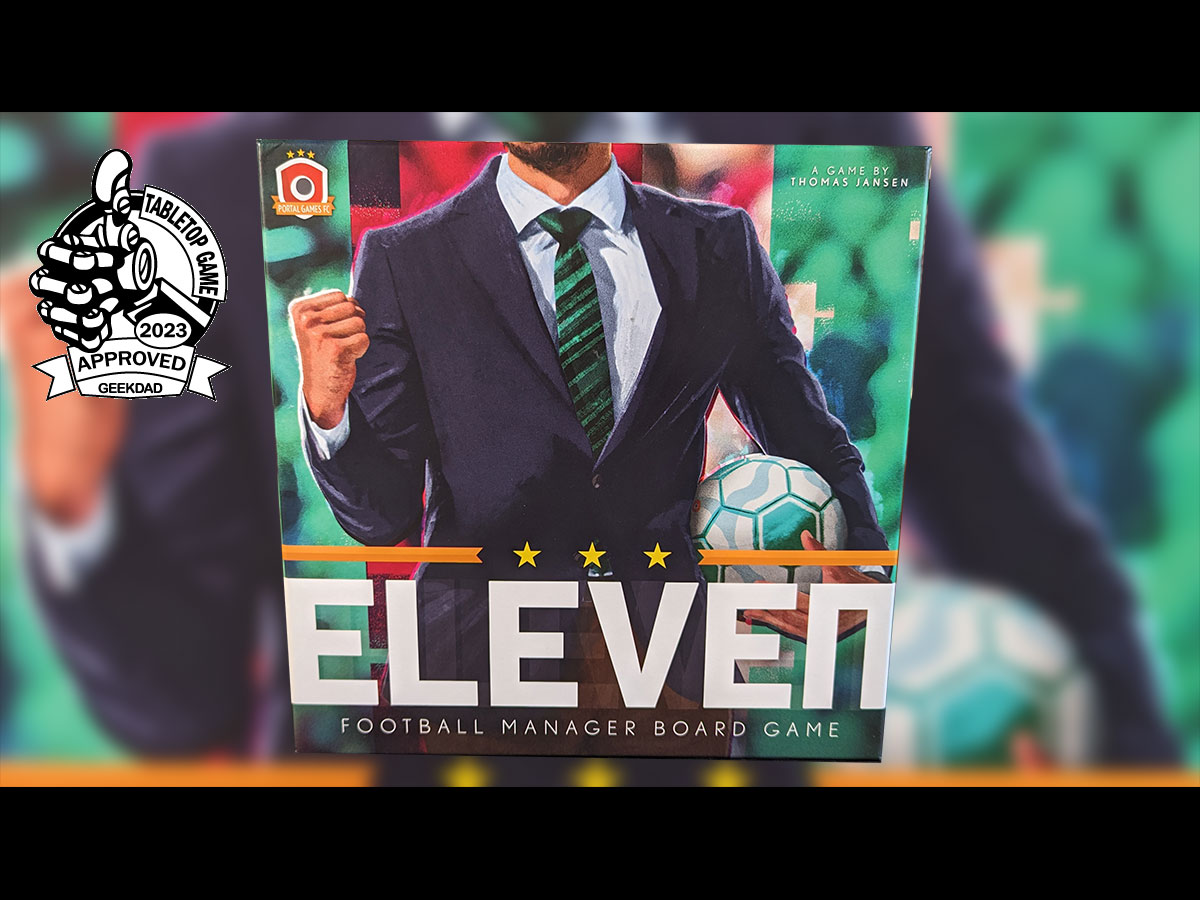
While plenty of kids dream of someday becoming a world-famous (and exceptionally wealthy) soccer player, how many more dream of spending their days sitting at a desk that overlooks the pitch, hiring and firing players and staff, and being even more fantastically wealthy as the team’s owner? With Eleven from Poland’s Portal Games, you can live out those team ownership fantasies.
What Is Eleven: Football Manager?
Eleven: Football Manager is a game for 1-4 players, ages 10 and up, and takes about 120 minutes to play. The game is available via Portal’s website, Amazon, or your local game store.
Eleven: Football Manager was designed by Thomas Jansen and published by Portal Games, with illustrations by Hanna Kuik and Maciej Siminski.
A Few Notes Before We Start
First, a quick note on terminology for our American readers. You’ll figure this out very quickly, but this being a European game, “football” in Eleven is soccer, not American football. Mostly out of respect for the game’s designers, I’m going to refer to the game the way they do. I’m also going to use terms like “pitch” instead of “field.”
Second, and also mostly for our American readers, in a professional-level football game, there are eleven players on each side. In case you were curious about the game’s name.
Third, I want to mention that we here at GeekDad almost always review games that we receive as review copies, not games we actually purchase. A lot of that has to do with time—we only have so much time in a day to write reviews, and there’s always a backlog. But every now and then, we come across a game that we did buy with our own money from our real day jobs that deserves a review. This is one of those games.
And finally, there’s a natural confusion in this game around the use of the word “player,” as it could reasonably refer to either the actual humans playing the game, or the fictional people being hired to kick the ball around the pitch. There’s a note in the rules about the dual use of that word, and I’m going to follow the same technique here: players in lowercase refers to the actual humans, while Players, capitalized, refers to the fictional people.
Eleven: Football Manager Components

Note: My review is based on the Gamefound deluxe edition of the game. I will note throughout when I am talking about one of the many components that are special or upgraded from the normal, retail version of the game.
- Cardboard league table board
- 89 wooden resource markers
- 28 budget markers
- 20 fan base markers
- 20 operation markers
- 20 fitness markers
- 1 stage marker
- 136 cardboard tokens
- 20 double-sided strength tokens
- 12 double-sided weakness tokens
- 10 injury tokens
- 10 suspension tokens
- 24 double-sided victory point tokens
- 16 double-sided opponent team tokens
- 8 reminder tokens
- 8 multiplier tokens
- 28 stadium infrastructure tokens
- 275 cards
- 36 regular Player cards (45 mm × 68 mm)
- 18 “youngster” Player cards (45 mm × 68 mm
- 8 veteran Player cards (45 mm × 68 mm)
- 12 tactic cards (45 mm × 68 mm)
- 12 objective cards (64mm x 89mm)
- 16 director cards (64mm x 89mm)
- 36 staff cards (64mm x 89mm)
- 36 sponsor cards (64mm x 89mm)
- 36 board meeting cards (64mm x 89mm)
- 64 opponent cards (64mm x 89mm)
- 1 twelve-sided dice
- 3 custom opponent dice
- 3 scenario sheets
- 1 scorepad
Those are the shared components for everyone. Then, there are the individual components for each player:
- 4 cardboard match boards
- 4 cardboard stadium boards
- 4 cardboard club boards
- 16 wooden stat markers (4 in each color)
- 52 wooden jersey markers (13 in each color)
- 4 cardboard team emblem tokens
- 24 score/maintenance/office markers (5 in each color, plus four black)
- 4 cardboard team markers
- 4 six-sided dice
All of the cardboard components are nice, heavy 2mm cardboard. All of it is beautifully screen printed, and many of them are double-sided, which nicely saves space on the table (which will already be at a premium.)

As noted above, there are two sizes of cards in the game. All of the Players (divided into three groups: youngsters, regulars, and veterans), along with the tactic cards, are the smaller 45x68mm variety. And yet even at this small size, they cram a lot of information onto the cards but do it so well that the cards feel neither too crowded nor hard to read.

The remaining cards—the objectives, directors, staff, sponsor, board meeting, and opponent cards—are standard poker-sized cards. Like the smaller cards, these cards are packed with information that is loaded with useful but easily understood information. One very nice thing: even though the cards use some icons, they are clear and I didn’t find myself having to constantly go back to the rules to figure out what the symbols meant.

All of the wood pieces are custom-cut and painted with easily distinguishable colors. The deluxe set I got as a Gamefound backer included many pieces cut to the shapes to match the icons they represent, but I think the simple discs in the retail edition would still be entirely usable.

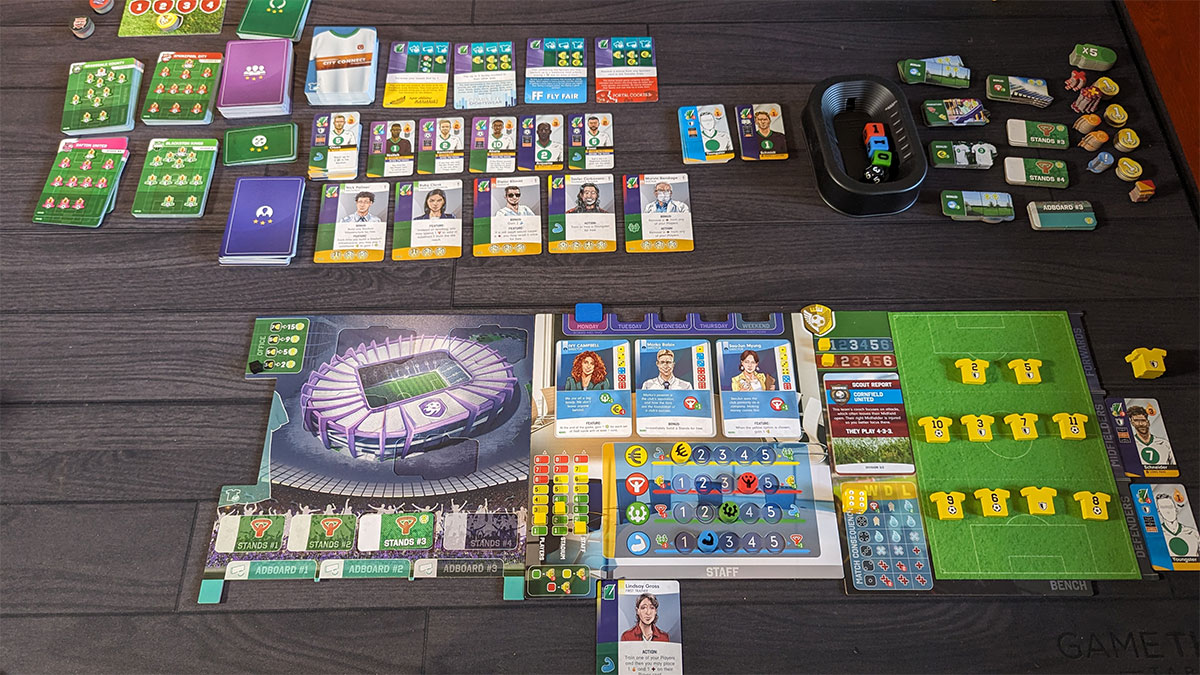
The main components players interact with are the stadium, match, and club boards and a series of tokens, both wood and cardboard, for their team. The stadium board is a nice piece that shows an aerial view of a stadium (it would have been cool if there were four different stadiums here, but as that has no bearing on gameplay, I can fully understand why there aren’t) with slots to put upgrades and stands. There’s a cut-out on the left side for the main shirt sponsor, with art partially on the board that aligns really nicely with the art on the matching card, and spaces at the bottom for other sponsors. I should mention here that in my edition, the stadium boards are two-layer, providing recessed areas for the parts that need to go on the boards. I honestly do not know if the retail edition has that feature.
The match boards are where players line up their teams for the weekly game. It’s another piece that shows the level of thoughtful design that went into everything in the game. The pitch is laid out to make it clear where each of the nine areas are that will determine the matchups, and it’s big enough that the jersey markers fit on the board with room to spare.
The club boards are nice and simple, with spaces for each of the three directors players can have (again, a nice touch: with three clear spots for these cards, there’s never any question as to how many directors a team can have), space below for staff, and reference tracks for the four statistics that need to be tracked. Once more, everything is perfectly sized. While far too many games provide boards like this that don’t really fit the pieces they’re designed to hold, on this one, everything fits just right. (And, again, in my edition this is a two-layer board, which may or may not exist in the retail edition.)

The player-specific tokens consist of colored discs to mark stats (or, in the deluxe edition, colored and shaped pieces), very cool jersey tokens that resemble the actual kit worn by players, and score/maintenance/office markers, which are simply colored cubes. Each player also gets a single d6 in their team color.
Eleven is a game that is impressive when set up at the table (even if it does require a lot of table space), thanks to the obvious time and care that went into its design and manufacture. Honestly, I’ve played games that cost far more and have far lesser components.
How to Play Eleven
You can download a copy of the rulebook here.
The Goal
The goal of the game is to come out on top of the standings at the end of the season. It’s worth remembering that unlike most other sports-related games, Eleven isn’t really about playing football, but rather, about managing your team to victory. While winning matches is important, it’s only one piece of the overall puzzle. Think of it more like Friday Night Lights or Moneyball—shows and movies that take place in the world of their sport, but aren’t really about the sport.
Setup
With so many components, one would assume that Eleven is going to require some considerable setup, and one would not be wrong.
The first thing to set up is the Transfer Area, where players will draft Players. The Player deck is divided into three individual decks: veterans, youngsters, and Players. Each is shuffled separately. Five Players are drawn off that deck and placed in a row with their “untrained” side up (the “trained” side has a symbol with three stars on it). The youngster deck is placed nearby, and the veteran deck is placed off to the side for later use.
Next, you need to find the first trainer cards and randomly deal one to each player. Remove from the remainder of the deck those cards that are marked in the top left corner with players counts other than what you have, shuffle what’s left, and deal out a face-up row of 5 staff cards below the Players, putting the rest of the deck next to it as a draw pile.
Shuffle the sponsor deck, deal out five face-up cards in a row below the staff, and place the rest of the deck nearby.
Individually shuffle the board meeting deck, the tactic deck, and the objective deck and place each near the transfer area. Divide the opponent deck based on the divisions, shuffle each set, and place them near the transfer area.
Place all of the remaining shared tokens in supply piles where they can be reached.
According to the rules, “the player who most recently scored a goal becomes the First Player and receives the Stage marker.” But obviously, if your group is less athletic, pick some other means of choosing the first player.
Each player needs to set up their area. Place the stadium, club, and match boards in front of you. The stadium board, it should be noted, needs space to its left, and the match board space to its right, so it makes the most sense to place them in that order. All three need space below. The office marker (the black cube) is placed below the office area in the upper left corner of the stadium board.
The first player places the stage marker in the Monday space at the top of their club board. The stat markers are placed in the second space of each of their tracks.
The director deck is shuffled, and four directors are dealt to each player. All players then draft directors: keep one of the four in your hand and pass the rest to the player on your left. Repeat that two more times until everyone has three directors, and then discard the remaining cards. All players then reveal their directors and, if any have immediate bonuses, those are applied. All directors impact at least one of the stats, so those markers are moved accordingly. All remaining director cards are returned to the box.
The first trainer card is placed below the club board. All of these cards are two-sided, but the only difference is whether the art and name present as male or female, but which side is showing has no impact on gameplay.
The match boards are set up by placing the club emblem in the top left corner (this doesn’t really impact anything and is more for visual flare), and the score markers (the colored cubes in the player’s color) are set to zero. Players collectively decide which division to play in, and then they draw three opponent cards from the appropriate deck, making sure to get three different teams (it doesn’t matter if multiple players get the same opponent, only that an individual player faces three different opponents). They then draw three cards from the more advanced division (for example, there’s a “3” division and a corresponding more advanced “3/2” division), and place the cards on their match board, with the more advanced opponents below the easier ones.
Each player draws one card from the youngster deck and one card from the veteran deck. These are placed to the right of the board. Note that all players have an icon noting which sections of the pitch they play (forward, midfield, defense) so these cards are placed according to their icon. It’s possible and okay if both cards drawn are in the same section of the pitch.
Then, 10 jersey markers are placed on the pitch with the side showing the football up. Each player has a set of 13 jerseys, numbered 1-10, with three blanks. In this initial setup, the only number you need to pay attention is the one that matches your veteran player—make sure to put that jersey in the correct section of the pitch. You’ll also use one of your blanks for the youngster. If either of those cards shows a defensive symbol (a shield), you’ll need to flip that jersey over. Then, flip the lowest-numbered remaining jerseys over so that you have five defenders (with shields) and five attackers (with footballs). At this point, it’s somewhat of a guess where you want Players, so don’t overthink this too much (yet). Place the remaining jerseys nearby as the “bench”.
Each player then draws two objective cards, keeps one, and discards the other. Players can look at these at any time, but they should remain hidden from opponents. Each player then draws one basic tactic card, after which the entire tactic deck is shuffled and placed somewhere on the table.
Finally, all players look back at their club board and place the remaining colored cubes on the three maintenance tracks. The exact placement of these varies a bit depending on the chosen directors, but they represent the current number of Players (2, unless a director allows for drawing more right away), staff (1, unless again changed by a director), and stadium infrastructure (4, for the two stands and 2 adboards pre-printed on the stadium board… unless, again, changed by a director card.)
The last bit of setup is the league table board. Here, all of the club markers for the players are placed on the zero space, along with the team markers for the teams in the chosen division. Put the three opponent dice somewhere nearby.
Have someone with a gruff British accent say “WHISTLE!” and you’re good to go.
Gameplay
The game is played over the course of 6 weeks, which are divided into a number of phases: Monday, Tuesday, Wednesday, Thursday, and Matchday.
Monday
The starting player places the round marker on the “Monday” slot at the top of their stadium board.
Monday’s actions are resolved by all players simultaneously. First, all players produce resources, based on their current positions on the Stat tracks and any stadium infrastructure tokens. Only the former applies for the first few rounds.
There are four resources in the game: Cash, Fan Base, Operation, and Fitness. The first is obvious—how much money did your team bring in this week? Cash is spent to hire Players and staff and invest in infrastructure. Because this is a European game, cash is denoted in Euros. As in the real world, players can horde cash. Fan Base is a representation of how popular your team is, and as a resource can be used as a tool for rerolling when you don’t get a result you want on the dice, and also as a way to populate your stands to make money. The Operation resource allows you to perform an additional action on your turn, and the Fitness represents the, well, fitness of your team, and is used to put players into games, along with other card-specific effects.

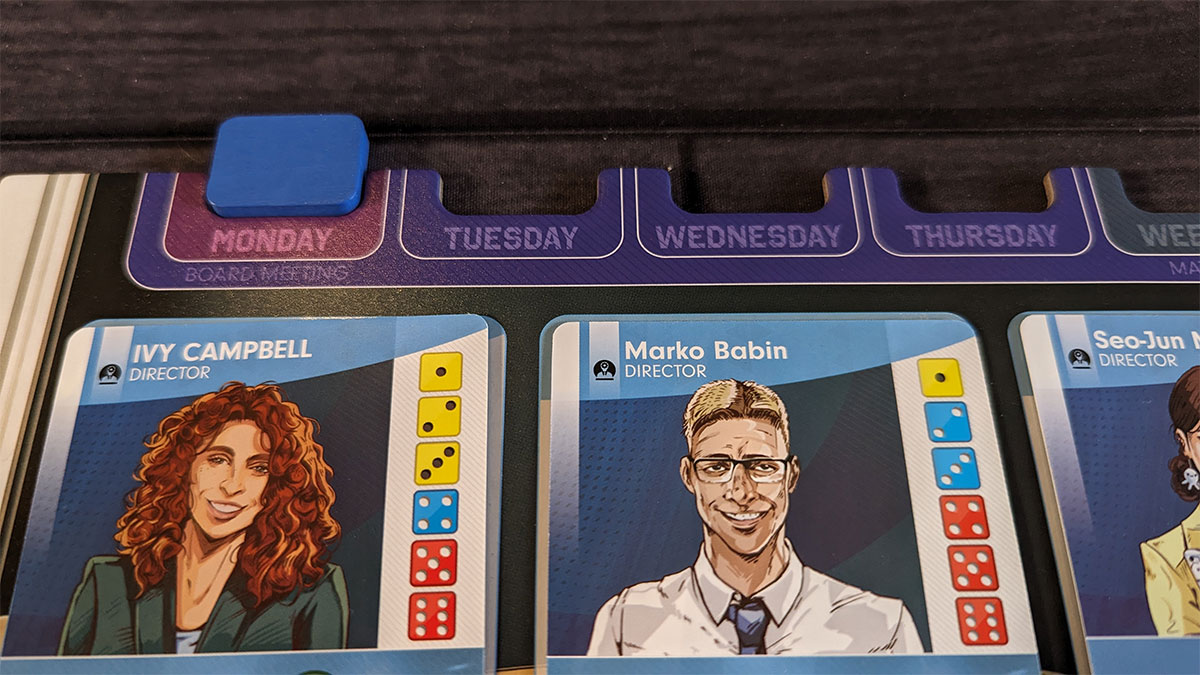
And, since everyone loves Monday meetings, this is when your board meets. Each player draws a card from the board meeting deck and places it face up in front of them. There’s a title and flavor text, but the important part of the card is the grid at the bottom. Each card has a yellow, blue, and red effect. The left column is more flavor text, and the right column is the important stuff: what will happen if your board chooses this action. So which one will you pick? Well, none, actually. It is, after all, a board meeting, and the decision is up to them.
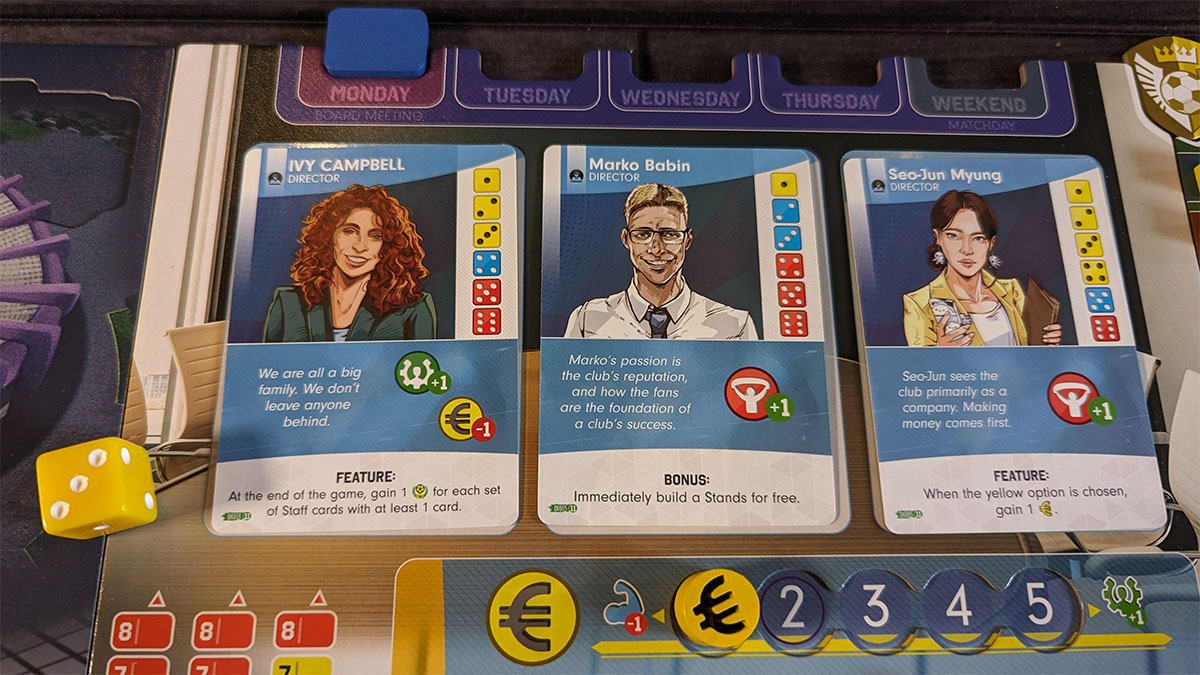
There’s a pretty cool mechanic here for the vote. Each board member card shows the six sides of the dice, with each colored yellow, blue, or red. Some directors will generally prefer yellow actions, and so may have three yellow dice, and maybe only one red. Others may be more even-handed and have equal numbers of each. Each player rolls a single 6-sided die and then checks their board members to see the result. A 1 will always be a unanimous decision for yellow, a 6 always unanimous for red, but the other numbers may be split. In the example below, a roll of a four would result in the blue decision, as two directors have blue four and the third a red four. A player may reroll the dice until they get the decision they want by spending one fan base resource per reroll. If there’s a tie—the number happens to be a different color on each director—you can reroll for free.

Once the vote is done, each player resolves the effect of their board vote. Board decisions override ongoing effects in the game if they conflict.
As soon as everyone’s board is done making decisions, the starting player moves the round marker to Tuesday.
Tuesday, Wednesday, and Thursday

On each of these days, players take turns performing one free action, choosing to pay to perform a second action, or passing.
The starting player goes first, and then players take turns moving around the table. When it gets back to the starting player, they move the round marker to the next day, then the next, until Thursday ends.
There are six actions available:
- Hire a Player or youngster
- Sell a Player or youngster
- Hire staff
- Contract a sponsor
- Build stadium infrastructure or offices
- Use a card action
You can perform each action more than once per week (so you could, for example, hire three Players in a week,) but can only perform one action per day (unless you pay for an additional action.) Each card may only be used once per week; rotate the card 90 degrees after using it so you don’t forget.
Hire a Player or Youngster

Each Player card has a cost in the upper left-hand corner. You may only hire one of the three right-most players on the Transfer Area. After hiring the Player, they are placed to the right of the Match Board next to the row indicated on their card. Then, all other players in the Transfer Area are shifted to the right, and a new Player is drawn from the deck and placed in the left-most position. (There are special card effects that may allow a player to hire one of the two Players furthest to the left on the Transfer Area, but generally, they are not available.)
When placing the player next to the Match Board, you also may need to flip the Jersey marker. I’ll get into more detail on that below when I talk about setting up the match, because I think it makes more sense then.
All Players have a trained and an untrained side. The untrained side (the side that shows the cost to hire the Player) is what should always be showing in the Transfer Area, and players are not allowed to look at the trained side before hiring a player.
Hiring a youngster is handed in the same way, but you simply draw the top card from the deck.
Sell a Player or Youngster
To get rid of a Player, discard the card and gain 2€ plus additional € equal to the Player’s current strength (which may be modified by plus and minus tokens) plus € equal to any victory point tokens they may have earned. If the Player is injured or suspended, you gain only half (rounded down) of the possible € for that player.
Hire Staff
Like Players, the cost to hire staff is printed on the top left corner. Like in the real (ideal) world, the more expensive the staff, the more abilities they bring with them. You can only purchase the two left-most staff, and once you do, shift the rest to the right and draw a new card to the left-most position. Add the purchased card below your club board.
Some staff have bonuses that you gain immediately when you purchase the card, and most have an additional action that you gain by hiring them. Note that some also have a cost that must be paid whenever you take the action, and keep in mind that all card actions may only be performed once per week.
Staff also have a colored bar at the bottom with a series of icons. At the end of the game, you will collect victory points for the number of cards in each set you have on your staff.
Contract a Sponsor

Choose one of the three right-most sponsor cards, then select which type of sponsor you want this to be. Shift the remaining sponsor cards to the right, draw a new one, and place it in the leftmost spot.
There are three types of sponsors. The first and generally most valuable is a jersey sponsor. (If you’ve ever watched a professional football match (or even a professional soccer match here in the States) you’ll notice that all teams have some kind of corporate sponsor as the primary focal point on the front of their jersey. There was even an entire episode of Ted Lasso devoted to this topic.) You can only have a single jersey sponsor. You gain the bonuses indicated in the right column on the card immediately, as well as the additional bonus in the middle of the card, and then place the card in the spot on the edge of the stadium board, where you’ll see the artwork lines up nicely.
The second sponsor type is for those advertising banners that line the edge of the pitch in a game. You get either the bonus from the middle column or the one in the middle of the card and then slip this into the indicated spot at the bottom of the stadium board. You can have up to two of these unless you build a third slot as part of your stadium infrastructure.
The final sponsor is a media ad. You gain the bonus on the left column of the card. Note that you never gain the additional bonus on the card with this type of sponsor. You can have as many of these as you want.
Build Stadium Infrastructure or Offices

You can expand your stadium to have more ad space, more stands for fans, or gain ongoing resource bonuses. Choose the infrastructure token you want, pay 3€, and place it in an appropriate spot on your stadium board. You may only place the adboard token in its indicated spot, and may only place stands in their spots. The other tokens can be placed in any other available spot, and you may purchase the same one more than once. Each infrastructure token also gives you victory points at the end of the game.
You can also build offices using the track in the top left corner of the stadium board. Note that this is easy to forget, but also a relatively cheap way to “buy” victory points.
Perform a Card Action

Most staff cards and some director cards have an additional action. Pay the cost (if any), perform the action, and then turn the card 90 degrees so that you know that you have “spent” the card and cannot use it again this week. Note that if a card has some kind of ongoing bonus as well, that is unaffected by using its action.
Matchday
Once all players have performed their Thursday actions (or passed), it’s time to move on to Matchday.
Matchday actions can be performed simultaneously by all players, but newer players may find it helpful to perform them step-by-step, one at a time.
There are three separate steps to the match: prepare for the match, resolve the match, and check the results.

To prepare for the match, first, you need to set your lineup. You should start by reading the “scouting report” on the card for your opponent. It might not help at first but once you become more familiar with the game there are definitely clues in there as to how to set your team.
You now play a tactic card from your hand. You drew one during setup, and there are other things in the game that can get you more. The tactic cards show either two formations you can use to align your players, or one formation and an effect. If you play one with an effect at this stage, you will not be able to use that effect.

Now, you choose your Players. This goes back a little bit to the step where you hired Players. Each player has three key pieces of information for this step of the game: their number, the zone they play in, and whether they play offense or defense. (That last is represented by an icon: a football for offense, and a shield for defense. When you hire a Player, you are supposed to put that Player card next to the zone in which they play, and then put the wooden jersey token with their matching number in that zone, on the side representing whether they are an offensive or defensive player. But, importantly, once you place a jersey token, you cannot flip it from offense to defense.
Here in the match setup, you can move players around a little bit. They cannot ever move to a zone other than the one on their card. Also, two Players with the same number cannot play at the same time, so if you do have two Players who share a number, you need to move one to your bench. You also must pay one strength token for every Player you plan to use by placing the token on their card. If you have Players on the bench, you can swap them in, so long as you make sure to put them in the right zone. Oh, and you need to set your lineup according to one of the two diagrams on the tactic card you played.
I know this may sound very confusing, but when you do it in the real game, it turns out to be simpler than it sounds.
Some Player cards have additional effects that might come into play here. Each one states when it can happen—before, during, or after the match—and what resources you need to pay in order to use it. Others may have mandatory “before the match” effects you need to resolve now. If you have any injured or suspended Players, they cannot be put on the pitch and must go to the bench.

Once you have your lineup in place, you can put a single fan resource token on each stand token on your stadium. You will gain cash for them after the match. If you have upgraded to all four stands and placed one fan token in each, you have a sold-out match, which might be necessary for some additional effects on some cards (but won’t matter otherwise.)
Resolving the match—playing the game-within-the-game, is the most abstract element of Eleven and the one that took me the longest to fully wrap my head around. It definitely helps to take this slow, make sure of each step, and maybe have your opponents watch to make sure you don’t mess anything up (which is easy to do until you get the hang of it.)
First, flip over the opponent card. You’ll see the same nine zones represented there, along with a goalkeeper. (You may or may not have a specific goalkeeper, by the way—they’re a good type of Player to hire if you see them.) You can now play an additional tactic card—not the one you played when you set the team—and apply its effect. Next, you can resolve any Player effects that happen “during” the match for which you allocated resources, being sure to exhaust each one so you know you’ve already used that effect. (Don’t worry, the player can still do his thing during the match itself.)
Now, the hard part. The pitch is divided into 9 zones and 5 sections. (This is one of the more confusing elements of the rules that isn’t really made clear until they give an example of a full match on page 23.) The five sections are the three in the middle, and then each of the two “wing” sections down the sides. (It can be a little weird here since those wing sections are still divided up into three separate zones.) You also have to remember that the view of the pitch is reversed for each side, so the wing to your right on your pitch matches up with the left wing on the opponent card. (Opponent cards are intentionally printed upside down for this reason, but be sure to place it that way when you’re done reading it.)
Before I describe the match, I need to briefly pause and talk about goalkeepers. Goalkeepers are not represented by jersey tokens since you always have one. (This is why the formations on tactic and opponent cards only add up to 10, not 11.) If you are fortunate enough to be able to hire a goalkeeper (they are mixed into the Player deck) then you can put them on the pitch and use their ability.
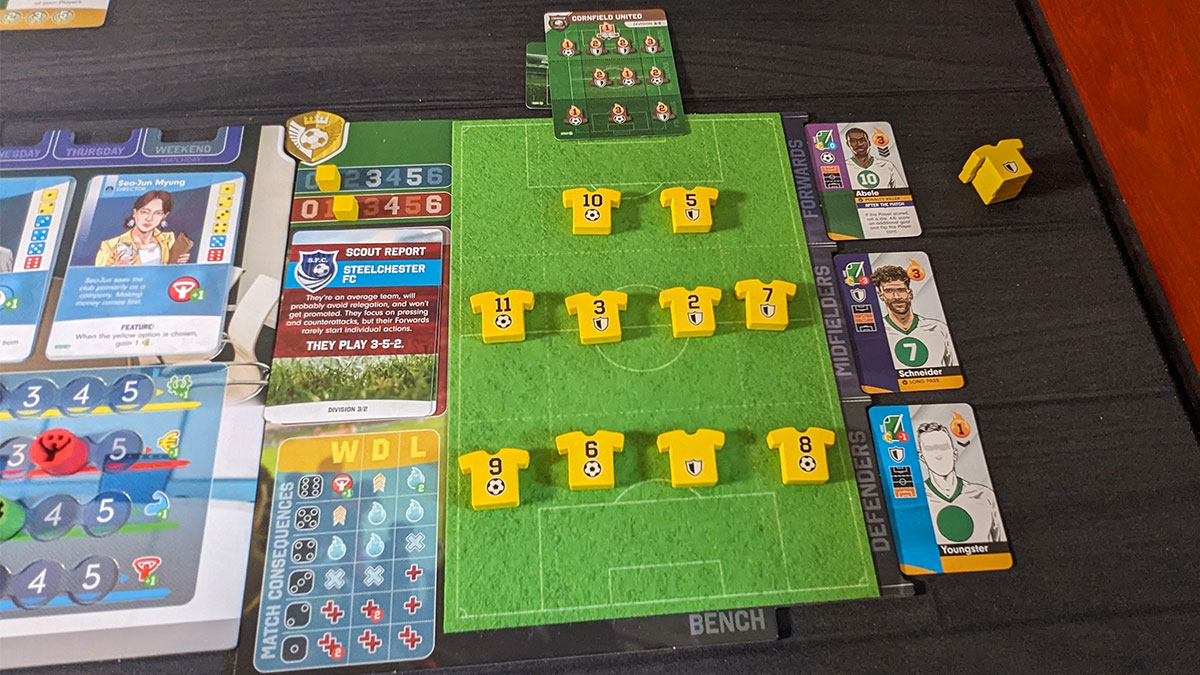
Starting with one of the wings, you’re going to find pairs of offensive and defensive Players and compare their strengths. So in the example image above, I have two offensive Players in my left zone, both with a strength of 1 (because neither of them have player cards associated with them) and my opponent has two offensive Players, each with a strength of 1. In theory, this means that both of my Players and both of theirs score… except that they have a goalkeeper who can block two shots and I do not. I only have the default goalkeeper, who can only block one shot. So, both of my shots are blocked, but only one of theirs is, and the score is now 0-1 them.
On the other wing, I have an offensive Player with 1 strength, but then jersey #7 is the player represented by the card, who has a strength of 3. They have two defenders, strengths 2 and 3, and one offensive Player, strength 2. The end result: everything over there cancels out.
In the middle, we have three zones. Starting from the top of the matchboard, I have a defender and an offensive Player, both strength one. They have two defenders with strength 2 each. Note that the zone at the top of the board matches up to the zone at the top of their card, where their goal is. So, they block my shot and don’t take one themselves.
In the middle of the field, I have two defenders to their one defender and one offense, so I block their shot.
In the backfield, I have an offensive Player with a strength of 1 and a defender who is my youth Player, who unfortunately still has a strength of one. They have only a single offensive player. So, my offense scores—it’s now 1-1—but their offensive Player’s strength of 3 overwhelms my rookie, scoring two goals. (Remember that the goalkeepers got used in the first set of comparisons, so they no longer block.)
And the match ends with my defeat, 1-2. Bummer. But maybe we’ll do better next week.
Once all of the matches have been resolved, you move on to the “end of the week” clean-up phase. Unexhaust all exhausted cards. Move all of the score markers back to zero. Discard the opponents you played against this round.

Each player then checks their position on the maintenance tracks. You should double-check all of these to make sure they’re right: you should have your markers in the right position based on the number of Players, staff, and infrastructure tokens you have. (Note that offices do not count as infrastructure.) Then, pay € equal to your spot on each track. If you cannot pay on any of the tracks, place two suspended tokens on a staff member for each € you cannot pay, starting with staff that do not already have suspended tokens. Discard the right-most card in each of the Player, staff, and sponsor rows, shift everything over, and draw new cards. Discard the top card from the youngster deck.
Each player may keep no more than one each of the fan, strength, and operation tokens, but can keep all of their cash.
The stage marker is passed to the player to the right of whoever was the starting player this round, and you begin a new round.
Game End
The game ends after the sixth round. You’ll know it’s time because you will have discarded the last opponent card.
To calculate the score, first look at each team’s position on the league standings. While the matches may be abstract in this game, winning matches is still the primary marker for a successful football team, so the first place team scored 15 victory points, the second place team 10, third place 8, fourth 6, fifth 4, sixth 2, seventh 0, eighth -2, and ninth -4. Note that the position here is based on the total league standings, not just the player teams. Also, if two teams are tied, they both score all of the points.
Next, count up the victory point tokens you have earned from youngster cards and your supply.
Figure out which sets of staff cards you collected and gain victory points according to the keys on the bottom of the staff cards.
Collect victory points based on your stadium infrastructure cards and any offices you have built.
Then, lose one victory point for each suspended token on any of your cards (this is where failing to pay for Players and staff really comes back to bite you.)
Whoever has the most victory points wins. If there’s a tie, then whoever is higher on the league standings wins. If there’s still a tie, the game is a tie.
Variants
The rules include a set of variants and scenarios you can play to further enhance the game. One that I feel is very important and should always be used is the head-to-head matchup, where one of the games during the season is played against one of the other players in the game. Eleven began life as a solo game, and unfortunately, it shows in the base rules, as there is almost no direct player interaction. Thankfully, this variant addresses this issue and solves it in a very thematic way.
Eleven is a 2023 Game of the Year Finalist!
Why You Should Play Eleven
You can see from the sheer length of this post that Eleven is a very complex game, and as such probably isn’t for everyone. But for those who want to invest the time in a deep, strategic game, Eleven is going to be one of my top picks.
What makes it work? Well, for starters, it’s a sports game that isn’t really about sports. It’ll surely appeal to sports fans—particularly fans of European football—but if you hate sports and think that soccer is particularly boring, you can still enjoy the heck out of this game. It is, at its core, a resource management and economics game, so fans of 18xx and similar heavy strategy games will find plenty to love here, entirely separate from the game.
You need a pretty big space to play Eleven, but that’s because the components are so great. The designers clearly decided early on that they were going to go for a great table presence and lots of gorgeous components, even if it meant sacrificing playing this on a small coffee table in the living room. But again, it’s not a game targeted at the more casual gaming crowd, so if you already have your eye on Eleven, that won’t be a turn-off.
Yes, I went all-in for the deluxe edition, but from what I can see in the rules, even the more basic edition will look great while you play it. You won’t have as many cool little wooden pieces to fiddle with during other people’s turns, but you aren’t going to let this game collect dust on the shelf because of that, either.
And despite its complexity, a game of Eleven moves pretty fast. Yes, it takes a couple of hours to play, but you’re going to spend almost all of those couple of hours actually doing things in the game. There are a lot of simultaneous actions you can take, so you aren’t sitting around waiting forever for other players to take their turns. Everyone is engaged most of the time while playing, so there isn’t a lot of time for anyone to get bored.
And I just want to circle back to something I mentioned at the outset. It’s fairly rare for us to take the time to review games we actually purchase because we always have a backlog of games we need to review. So the fact that I did take the time to write this review should say something, too. I do think that Eleven is a special enough game to warrant the time to give it this GeekDad-approved review.
If you’re looking for a heavy strategy game and want to try something in a theme that isn’t usually the domain of heavy strategy games, I highly recommend checking out Eleven.
Click here to see all our tabletop game reviews.
![]() To subscribe to GeekDad’s tabletop gaming coverage, please copy this link and add it to your RSS reader.
To subscribe to GeekDad’s tabletop gaming coverage, please copy this link and add it to your RSS reader.
Disclosure: GeekDad received a copy of this game for review purposes.